Computer Imaging
This guide is intended for both refreshing and teaching the computer imaging process to student hourlys who do not require an in-depth understanding of the process. Make sure to read the entire guide before attempting to image computers as mistakes can cost large amounts of time and be of great inconvenience.
Contents
Making the Image
Name the computer with instr somewhere in the name. This allows Tivoli Endpoint Manager (TEM) to know that the computer has not been localized (to the room) yet. TEM therefore does not set up printers and other tasks.
Taking the Image
1. On the computer you will be taking the image of, search for SecureCRT 6.5 under the windows button on the lower left corner of the desktop; open SecureCRT 6.5. If it asks to check for updates simply ignore. A Connect window should appear.
2. Connect to drbl.physics.wisc.edu
3. Log in with your username and password. Don't have one, talk to your boss and he will redirect you someone who can create an account.
4. Type the command sudo /opt/drbl/sbin/dcs into the SecureCRT command window. Press Enter. A user interface, like the one pictured below, should appear. From here on you will be utilizing the arrow keys, space bar, tab, and enter buttons on your keyboard to navigate the menus.
5. Use the arrow keys to highlight the Part Select Client(s).... command. Press Enter. A new window should appear explaining that you can create new IP addresses, ignore and simply press Enter.
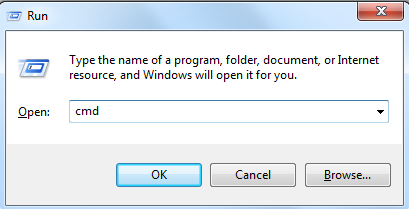
6. Hit Windows Key + R to open the run window. Type cmd and press Ok. This opens up the Windows control terminal for the computer you are currently on. This is necessary for determining it's IP address.
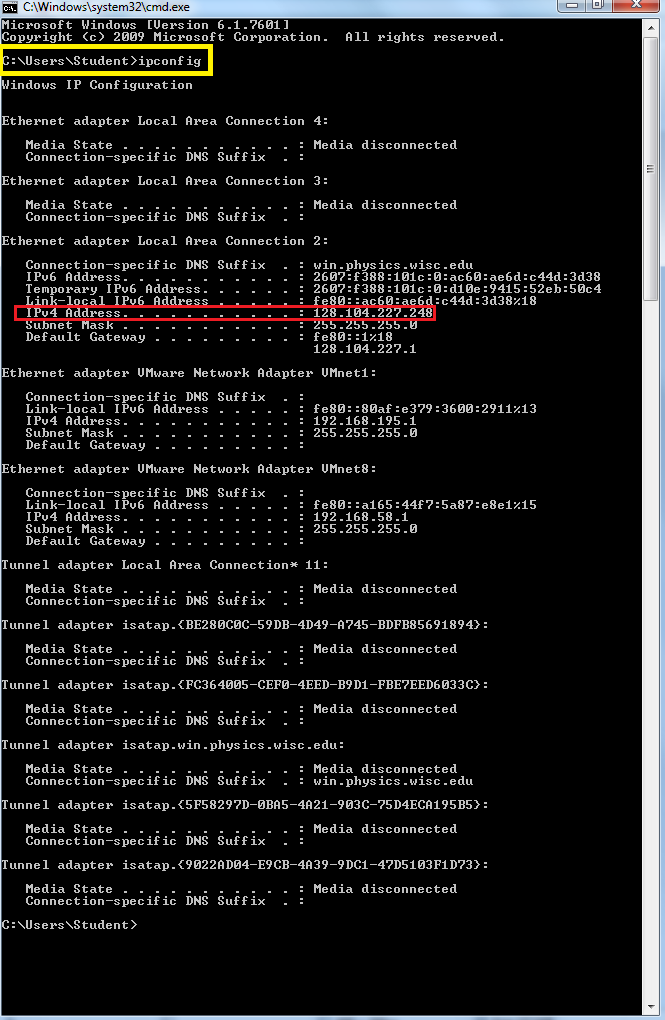
7. Type ipconfig in the command window and press Enter. You should see something similar to what you see below. Find the IPv4 Adress that begins with 128.104.227. The last three digits, 248 in the example below, is the number you want to remember.
8. Go back to your SecureCRT 6.5 window and use the arrow keys to find the IP address that corresponds to the number you just found. Once found, click the space bar. If done correctly, an asterisk should appear in or next to the box as can be seen below. Once done, press Tab and then press Enter.
9. Use the arrow keys to highlight clonezilla-start. Press Enter. Use the arrow keys to highlight Beginner Mode. Press Enter
10. From this window we have a variety of options. Since we are going to be taking an image, highlight save-disk and press Enter. Later on when you are deploying your saved image the restore-disk option will be used.
11. Highlight Now_in_server and press Enter. This interface is particularly poor so be careful when entering the name of the image!! Click the right arrow key a few times to ensure you are at the end of the pre-designated file name. Hold down the Backspace until the cursor stops moving to delete the file name.
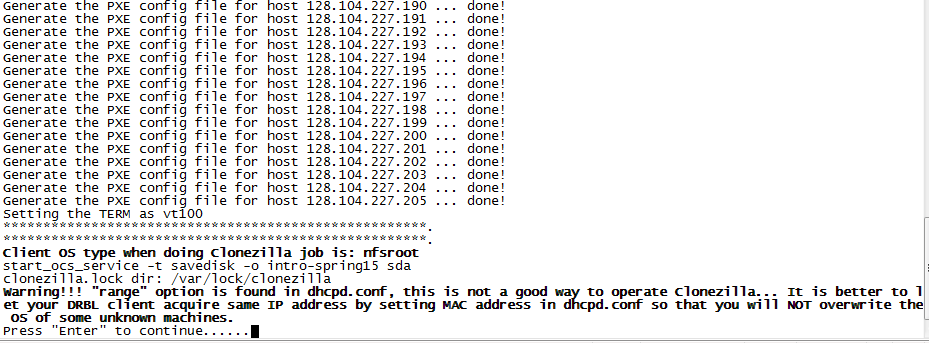
Images are named <level>-<semester><year>-rev<n>. The parts are level, "adv" or "intro"; semester, "fall" or "spring"; year, "2010", for example; n is a revision number, used only for small changes to the same basic image. If we are making an image of the introductory computers for the Spring of 2015, for example, the name would be intro-spring15 as is shown below. Remember, the interface is broken so it will not look correct.
Once you entered a correct name press Enter.
11. A window containing the word sda should appear. Press Enter.
12. A window should appear asking whether or not the image you make should be tested after it is taken. For time and convenience, simply highlight -sc No, skip checking the saved image. Press Enter.
13. A window should appear asking what you want the computer to do after it is done taking the image. Highlight either -p reboot or -p poweroff depending on what you desire. Press Enter.
14. A window should appear asking the size, in megabytes, of the partition image. The suggested number that appears, 1000000, should suffice. Press Enter.
15. Almost done! The computer is getting prepared for the image. Simply press Enter when it tells you to and eventually it will say something along the lines of <username> done!
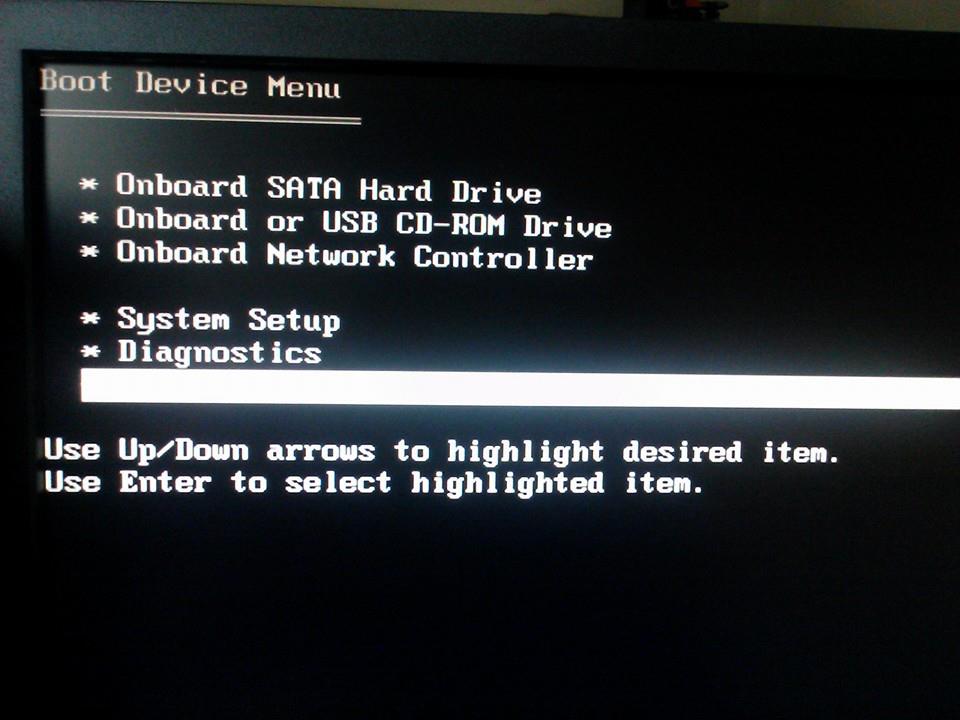
16. Restart the computer you wish to image. Once the screen goes black, hold down F12 to trigger the one-time boot mode. You should hear a beep come from the computer if this is done correctly.
17. Once the boot menu loads, use the arrow keys to highlight Onboard Network Controller. Press Enter.
18. If the computer is correctly connected via an Ethernet cord and the the above tasks were done correctly, the computer should automatically start running clonezilla. Once new text stops being written to the screen an estimated time to completion and progress output should be displayed. Once the computer reboots or turns off the image is saved and ready to be deployed.
Image Deployment
To deploy an image you will also be utilizing clonezilla. Before you start-up SecureCRT and clonezilla, some preparation must be done on the computers you wish to deploy an image on. Deploying an image is possible with one person but having a team of 2-3 people is very helpful and can speed the process up immensely.
Computer Preparation
1. Restart ALL the computers you wish to deploy an image on and enter the one-time boot menu by holding down F12 during the initial computer start-up. This will take some time!
2. Highlight the Onboard Network Controller option but DO NOT PRESS ENTER YET! You will be pressing enter on all the computers once the image has been deployed via clonezilla.
3. Ensure each computer is connected, via Ethernet cable, to a working Ethernet port in the wall. This is particularly important in the TA prep room where you may have to plug in the left-over computers into the modem located on the printer cart.
4. Write down the IP addresses of all the computers you wish to image.
Intro Labs: Computer IP Addresses, the IP addresses should range from XX1-XX9 for each room as printers hold the XX0 numbers.
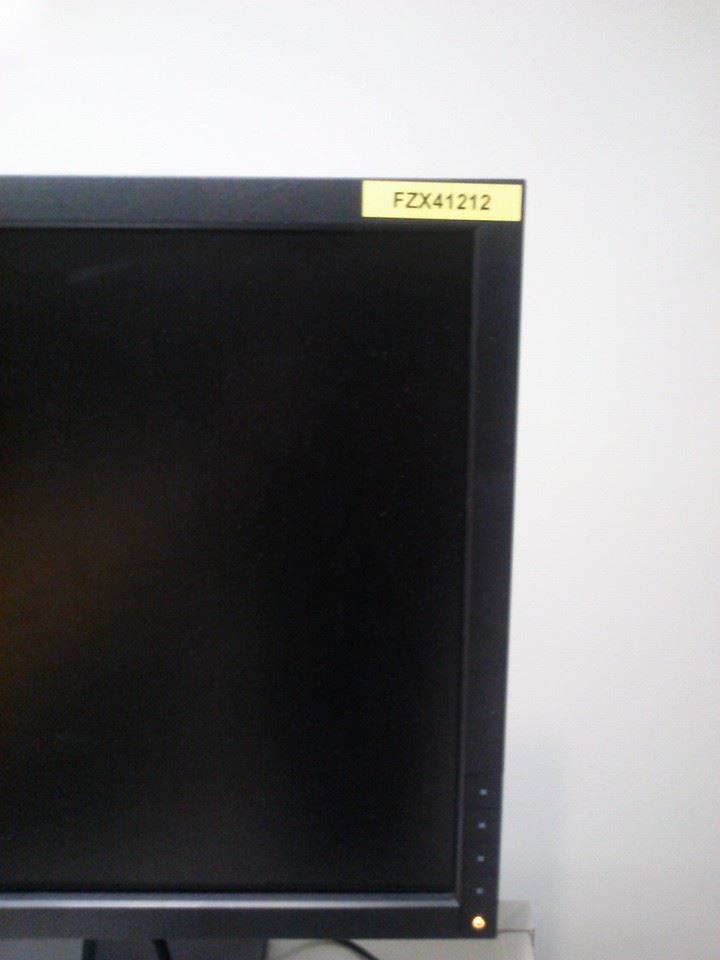
Advanced Labs: Utilize the ipconfig method on one of the computers in a given lab. Now use the LAST digit of the number on the yellow sticker (located in the upper-left corner of the computer monitor) to determine the other IP addresses in the lab. For example, a computer with an IP address ending in 248 will have a sticker FZXxxxx8. All other computers in a lab are within the same decade so you can utilize the last digit of the stickers to determine the range of IP addressees in a given lab. NOTE: Not all advanced labs have 9 computers so make sure you go around to every computer to check the stickers.
Pushing the Image
Once all computers are in one-time boot mode, connected via ethernet, ready to boot from the onboard network controller, and the IP addresses are known, it is time to start up clonezilla.
1. On any computer, search for SecureCRT 6.5 under the windows button on the lower left corner of the desktop; open SecureCRT 6.5. If it asks to check for updates simply ignore. A Connect window should appear.
2. Connect to drbl.physics.wisc.edu
3. Log in with your username and password. Don't have one, talk to your boss and he will redirect you someone who can create an account.
4. Click the up arrow in the secureCRT terminal window to obtain the last command you entered, sudo /opt/drbl/sbin/dcs. Press Enter. A user interface, like the one pictured below, should appear. From here on you will be utilizing the arrow keys, space bar, tab, and enter buttons on your keyboard to navigate the menus.
5. Use the arrow keys to highlight the Part Select Client(s).... command. Press Enter. A new window should appear explaining that you can create new IP addresses, ignore and simply press Enter.
6. Find the IP address that correspond to the numbers you wrote down. Once found, click the space bar on all the numbers. If done correctly, an asterisk should appear in or next to the boxes as can be seen below. Once done, press Tab and then press Enter.
7. Use the arrow keys to highlight clonezilla-start. Press Enter. Use the arrow keys to highlight Beginner Mode. Press Enter
8. From this window we have a variety of options. Since we are going to be deploying an image, highlight restore-disk and press Enter.
9. A window should appear asking what you want the computer to do after it is done taking the image. Highlight either -p reboot or -p poweroff depending on what you desire. Press Enter.
10. A window should appear with a list of all the saved images. Highlight the image you want and press Enter.
11. A window should appear asking you where you want to save the image. Simply press Enter.
12. From this window we also have a variety of options. If you are only deploying an image to 1 computer, use the unicast option. If you are deploying an image to multiple computers, use the multicast option.
13. If you choose multicast you will be presented with some more options. The best option here is clients+time-to-wait as it will be the most convenient.
14. A window should appear with a number. That number should be the number of your computers you wish to deploy an image to. If it is not, hit Tab twice and press Enter; you didn't select the correct computers in Step 6. If the number is correct, press Enter.
15. Another window will appear with a number representing the time, in seconds, that you will have to run around to all of the computers and press enter. If you are working as a team 300 seconds should be alright but I would suggest doing 600 just to be safe. To enter 600 in this bad interface, first hold the Backspace button until the cursor stops moving. Type 600 and then press Enter.
16. Press Enter at the next window.
17. From here on out just continue to press Enter when prompted. Once you see something along the lines of <username> done! the timer starts and you can start going around to your computers.
Catching the Image
1. Go around to each of the computers you prepared and press Enter on Onboard Network Controller.
2. Clonezilla should automatically start writing text to the screen. If you hear the computer beep, something is wrong. A few common issues are described below:
Ethernet Connection: most of the time the problem stems from the Ethernet connection. Ensure the cable is securely connected to both the computer and the wall. If it is either the cable of the wall connection is broken. In this case you must either improvise on the spot or wait to image the computer another time.
Incorrect IP address: sometimes computers get moved around, without our knowledge, or you simply didn't click the correct IP addresses in the part selection window in Step 6 of the Pushing the Image section. Either way, there is no way to fix this problem for the current run and you will have to re-deploy the image to the specific computer in question.
3. Eventually the screen will turn blue and display a progress meter. This is good! Your computer is in stand-by to receive the image you are deploying. If you choose the clients+time-to-wait option previously, the computers will not start to make progress until either all the computers have reached that point or the allotted time you set has ran out.
4. Once progress begins on the image a second blue screen will appear with the final progress meter. Here you can see an estimate (a very poor one at that) of how long the deployment will take. The more computers you are working with the longer it will take so deploy wisely!

