|
Size: 2793
Comment:
|
← Revision 17 as of 2015-08-05 14:28:40 ⇥
Size: 3014
Comment:
|
| Deletions are marked like this. | Additions are marked like this. |
| Line 2: | Line 2: |
| ||<:30%>[:PiraScheme#Mechanics: Table of Mechanics Demonstration]||<:30%>[:MEEquipmentList: List of Mechanics Equipment & Supplies]||<:30%>[:Demonstrations:Lecture Demonstrations]|| | ||<30% style="text-align:center">[[PiraScheme#Mechanics|Table of Mechanics Demonstration]] ||<30% style="text-align:center">[[MEEquipmentList|List of Mechanics Equipment & Supplies]] ||<30% style="text-align:center">[[Demonstrations|Lecture Demonstrations]] || |
| Line 5: | Line 6: |
| '''Topic and Concept:''' | |
| Line 6: | Line 8: |
| '''Topic and Concept:''' Measurement, [:Measurement: 1A10. Basic Units] |
. Measurement, [[Measurement|1A10. Basic Units]] '''A PIRA-200 Demo''' |
| Line 10: | Line 13: |
| * '''Cabinet:''' [:MechanicsCabinet:Mechanic (ME)] | * '''Cabinet:''' [[MechanicsCabinet|Mechanic (ME)]] |
| Line 12: | Line 16: |
| * '''Shelf:''' Cubby | * '''Shelf:''' Cubby |
| Line 14: | Line 18: |
| attachment:StandardMeter-01-400.jpg | {{attachment:StandardMeter-01-400.jpg}} |
| Line 18: | Line 22: |
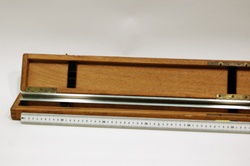
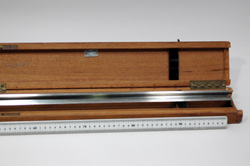
| This is a calibrated stainless steel bar with 100 1cm marking on it, know as a Standard Meter. ||<:style="width: 60%" :40%>'''Equipment'''||<:30%>'''Location'''||<:25%>'''ID Number'''|| |
This is a calibrated stainless steel bar with 100 1cm marking on it, know as a Standard Meter. ||<40% style="text-align:center">'''Equipment''' ||<30% style="text-align:center">'''Location''' ||<25% style="text-align:center">'''ID Number''' || |
| Line 22: | Line 25: |
| ||Standard Meter||ME, Cubby C3|| || ||Magnifier ||OP, Bay A1, Shelf #1|| || |
||Standard Meter ||ME, Cubby C3 ||1A10.30 || ||Magnifier ||OP, Bay A1, Shelf #1 ||EQ || |
| Line 26: | Line 29: |
| '''''Important Setup Notes:''''' | '''''Important Setup Notes:''''' |
| Line 29: | Line 35: |
| '''Setup:''' | '''Setup and Procedure:''' |
| Line 31: | Line 37: |
| 1. A table top camera and lamp can be used to show the mm groves to audience. | 1. A table top camera and lamp can be used to show the mm groves to audience. |
| Line 34: | Line 40: |
| * When Cleaning, use a cotton ball and alcohol. | |
| Line 37: | Line 41: |
| '''Demonstration:''' | * When Cleaning, use a cotton ball and alcohol. |
| Line 39: | Line 43: |
| Show the students how long the meter is. Highlight the importance of standard and precise units. Use the light to illuminate the meter and the magnifying glass to magnify the fine graduations on the meter. | '''Discussion:''' Show the students how long the meter is. Highlight the importance of standard and precise units. Use the light to illuminate the meter and the magnifying glass to magnify the fine graduations on the meter. |
| Line 42: | Line 48: |
| || {{attachment:StandardMeter-02-250.jpg}} || {{attachment:StandardMeter-03-250.jpg}} || || {{attachment:StandardMeter-12a-250.jpg}} || {{attachment:StandardMeter-12b-250.jpg}} || |
|
| Line 44: | Line 52: |
| ||attachment:StandardMeter-02-250.jpg||attachment:StandardMeter-03-250.jpg|| ||attachment:StandardMeter-12a-250.jpg||attachment:StandardMeter-12b-250.jpg|| |
|
| Line 49: | Line 56: |
| 1. [http://www.surveyhistory.org/the_standard_meter1.htm surveyhistory.org] 1. [http://www.nist.gov/index.html National Institute of Standards and Technology's web site] |
* [[http://www.surveyhistory.org/the_standard_meter1.htm|surveyhistory.org]] * [[http://www.nist.gov/index.html|National Institute of Standards and Technology's web site]] |
| Line 52: | Line 59: |
[:Instructional:Home] |
[[Instructional|Home]] |
Standard Meter, 1A10.30
Topic and Concept:
Measurement, 1A10. Basic Units
A PIRA-200 Demo
Location:
Cabinet: Mechanic (ME)
Bay: (C3)
Shelf: Cubby
Abstract:
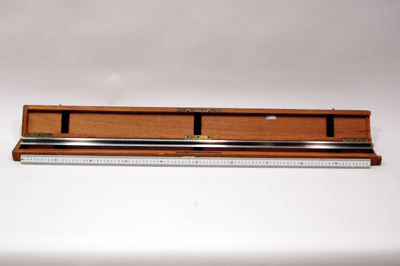
This is a calibrated stainless steel bar with 100 1cm marking on it, know as a Standard Meter.
Equipment |
Location |
ID Number |
|
|
|
Standard Meter |
ME, Cubby C3 |
1A10.30 |
Magnifier |
OP, Bay A1, Shelf #1 |
EQ |
Important Setup Notes:
- Wooden box has been damaged. The bar could slide out.
Setup and Procedure:
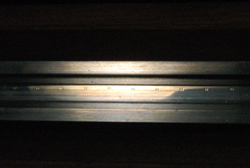
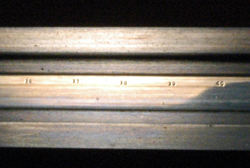
- A table top camera and lamp can be used to show the mm groves to audience.
Cautions, Warnings, or Safety Concerns:
- When Cleaning, use a cotton ball and alcohol.
Discussion:
Show the students how long the meter is. Highlight the importance of standard and precise units. Use the light to illuminate the meter and the magnifying glass to magnify the fine graduations on the meter.
The metric system was originally set up in 1791 by the French National Assembly. The meter was intended to be one ten millionth part of a quadrant of the earth through Paris, (an arc from the pole to the equator). The meter was fixed by law in 1799, and it became compulsory in France in 1801. The platinum Meter des Archives was the material standard until 1889 when it was super seeded in the by a platinum iridium bar stored under controlled conditions at the International Bureau of Weights and Measures at Sevres . This standard was abandoned in 1960 for several reasons, a principal one being that the limited accuracy with which the separation between lines on the bar can be determined does not meet the present requirements of science and technology. Until recently, the meter was defined as 1,650,763.73 wavelengths of orange-red light emitted from a krypton-86 lamp. However, in October 1983, the meter was redefined as follows: One meter --> The distance traveled by light in a vacuum during a time of 1/299,792,458 of a second.
|
|
|
|
References:
