|
Size: 3491
Comment: converted to 1.6 markup
|
← Revision 4 as of 2018-07-18 19:12:48 ⇥
Size: 3863
Comment:
|
| Deletions are marked like this. | Additions are marked like this. |
| Line 2: | Line 2: |
| ||<:30%>[[PiraScheme#Thermodynamics| Table of Thermodynamics Demonstration]]||<:30%>[[TDEquipmentList| Thermodynamics Equipment List]]||<:30%>[[Demonstrations|Lecture Demonstrations]]|| | ||<30% style="text-align:center">[[PiraScheme#Thermodynamics|Table of Thermodynamics Demonstration]] ||<30% style="text-align:center">[[TDEquipmentList|Thermodynamics Equipment List]] ||<30% style="text-align:center">[[Demonstrations|Lecture Demonstrations]] || |
| Line 5: | Line 6: |
| '''Topic and Concept:''' | |
| Line 6: | Line 8: |
| '''Topic and Concept:''' Thermal Properties of Matter, [[ThermalProperties#Thermometry| 4A10. Thermometry]] |
. Thermal Properties of Matter, [[ThermalProperties#Thermometry|4A10. Thermometry]] '''pira200 Listed''' |
| Line 10: | Line 13: |
| Line 19: | Line 23: |
||<:style="width: 60%" :40%>'''Equipment'''||<:30%>'''Location'''||<:25%>'''ID Number'''|| |
||<40% style="" ;text-align:center">'''Equipment''' ||<30% style="text-align:center">'''Location''' ||<25% style="text-align:center">'''ID Number''' || |
| Line 22: | Line 25: |
| ||Convection tube||[[ThermoCabinetBayB1| TD, Bay B1, Shelf #2]]??|| || ||Two stands w/ clamps||[[ThermoCabinetBayB1| TD, Bay B1, Shelf #2]]??|| || ||Food dye||??|| || || 1 L of water|| 1 L beakers are located above the sink in the lecture demo room || || ||[[RedWhiteGasCart|Red and white gas cart]]|| Rooms 2013 and 2241 (2223 upon request) || || || Burner || || || || Matches || || || |
||Convection tube ||[[ThermoCabinetBayB1|TD, Bay B1, Shelf #2]]?? || || ||Two stands w/ clamps ||[[ThermoCabinetBayB1|TD, Bay B1, Shelf #2]]?? || || ||Food dye ||?? || || ||1 L of water ||1 L beakers are located above the sink in the lecture demo room || || ||[[RedWhiteGasCart|Red and white gas cart]] ||Rooms 2013 and 2241 (2223 upon request) || || ||Burner || || || ||Matches || || || |
| Line 31: | Line 34: |
| '''''Important Setup Notes:''''' * '''''This demonstration requires a supply of methane gas usually provided by the [[RedWhiteGasCart|Red and white gas carts]] found in rooms 2013 and 2241 (2223 upon request). * '''''The glass tube is fragile. Handle with care.''''' |
|
| Line 36: | Line 36: |
| '''Setup and Procedure:''' | '''''Important Setup Notes:''''' |
| Line 38: | Line 38: |
| 1. Mount the tube so that the opening is on the top (see photos) by gently clamping both vertical portions to the stands. 1. Fill the tube with water so that the water level is about a half inch above the main tube (see photo). Try to get any air bubbles out. 1. Connect the burner to the gas supply (red panel on the gas cart) using the attached red gas hose. 1. Ignite the burner by opening the gas valve and lighting a match over the burner. 1. Place the burner underneath one of the vertical portions of the tube and adjust the flame height accordingly by adjusting the gas valve. 1. Add a few drops of food dye to the water through the top opening and watch them flow in the tube. |
* '''''This demonstration requires a supply of methane gas usually provided by the [[RedWhiteGasCart|Red and white gas carts]] found in rooms 2013 and 2241 (2223 upon request). ''''' * The glass tube is fragile. Handle with care.''''' ''''' |
| Line 45: | Line 41: |
| '''Cautions, Warnings, or Safety Concerns:''' * Careful not to burn yourself when working with the burner. |
''Setup and Procedure:''' ''''' 1. '''''Mount the tube so that the opening is on the top (see photos) by gently clamping both vertical portions to the stands. ''''' 1. '''''Fill the tube with water so that the water level is about a half inch above the main tube (see photo). Try to get any air bubbles out. ''''' 1. '''''Connect the burner to the gas supply (red panel on the gas cart) using the attached red gas hose. ''''' 1. '''''Ignite the burner by opening the gas valve and lighting a match over the burner. ''''' 1. '''''Place the burner underneath one of the vertical portions of the tube and adjust the flame height accordingly by adjusting the gas valve. ''''' 1. '''''Add a few drops of food dye to the water through the top opening and watch them flow in the tube. ''''' ''Cautions, Warnings, or Safety Concerns:''' ''''' * '''''Careful not to burn yourself when working with the burner. ''''' ''Discussion:''' ''''' '''''Discuss the physics behind the demonstration, explaining some of the various steps of the demonstration when appropriate. || {{attachment:ConvectionTube01-250.jpg}} || {{attachment:ConvectionTube03-250.jpg}} || {{attachment:ConvectionTube04-250.jpg}} || {{attachment:ConvectionTube05-250.jpg}} || || {{attachment:ConvectionTube06-250.jpg}} || {{attachment:ConvectionTube07-250.jpg}} || {{attachment:ConvectionTube08-250.jpg}} || {{attachment:ConvectionTube09-250.jpg}} || || {{attachment:ConvectionTube10-250.jpg}} || {{attachment:ConvectionTube11-250.jpg}} || {{attachment:ConvectionTube12-250.jpg}} || {{attachment:ConvectionTube13-250.jpg}} || || {{attachment:ConvectionTube14-250.jpg}} || {{attachment:ConvectionTube15-250.jpg}} || {{attachment:ConvectionTube16-250.jpg}} || {{attachment:ConvectionTube17-250.jpg}} || || {{attachment:ConvectionTube18-250.jpg}} || {{attachment:ConvectionTube19-250.jpg}} || {{attachment:ConvectionTube20-250.jpg}} || {{attachment:ConvectionTube21-250.jpg}} || |
| Line 49: | Line 64: |
| '''Discussion:''' | ''''' |
| Line 51: | Line 66: |
| Discuss the physics behind the demonstration, explaining some of the various steps of the demonstration when appropriate. | ''Videos:''' ''''' |
| Line 53: | Line 68: |
| ||{{attachment:ConvectionTube01-250.jpg}}||{{attachment:ConvectionTube03-250.jpg}}||{{attachment:ConvectionTube04-250.jpg}}||{{attachment:ConvectionTube05-250.jpg}}|| ||{{attachment:ConvectionTube06-250.jpg}}||{{attachment:ConvectionTube07-250.jpg}}||{{attachment:ConvectionTube08-250.jpg}}||{{attachment:ConvectionTube09-250.jpg}}|| ||{{attachment:ConvectionTube10-250.jpg}}||{{attachment:ConvectionTube11-250.jpg}}||{{attachment:ConvectionTube12-250.jpg}}||{{attachment:ConvectionTube13-250.jpg}}|| ||{{attachment:ConvectionTube14-250.jpg}}||{{attachment:ConvectionTube15-250.jpg}}||{{attachment:ConvectionTube16-250.jpg}}||{{attachment:ConvectionTube17-250.jpg}}|| ||{{attachment:ConvectionTube18-250.jpg}}||{{attachment:ConvectionTube19-250.jpg}}||{{attachment:ConvectionTube20-250.jpg}}||{{attachment:ConvectionTube21-250.jpg}}|| |
* '''''[[https://www.youtube.com/user/LectureDemostrations/videos?view=1|Lecture Demonstration's Youtube Channel]] ''''' |
| Line 59: | Line 70: |
| '''Videos:''' * [[https://www.youtube.com/user/LectureDemostrations/videos?view=1|Lecture Demonstration's Youtube Channel]] |
''References:''' ''''' |
| Line 62: | Line 72: |
| '''References:''' | * '''''List any references ''''' |
| Line 64: | Line 74: |
| * List any references [[Instructional|Home]] |
'''''[[Instructional|Home]] ''''' |
Convection Tube, 4B20.10
Topic and Concept:
Thermal Properties of Matter, 4A10. Thermometry
pira200 Listed
Location:
Cabinet: Thermodynamics (TD)
Bay: (A1)??
Shelf: #1,2,3.. ??
Abstract:
Insert succinct description of demonstration.
Equipment |
Location |
ID Number |
|
|
|
Convection tube |
|
|
Two stands w/ clamps |
|
|
Food dye |
?? |
|
1 L of water |
1 L beakers are located above the sink in the lecture demo room |
|
Rooms 2013 and 2241 (2223 upon request) |
|
|
Burner |
|
|
Matches |
|
|
Important Setup Notes:
This demonstration requires a supply of methane gas usually provided by the Red and white gas carts found in rooms 2013 and 2241 (2223 upon request).
The glass tube is fragile. Handle with care.
Setup and Procedure:
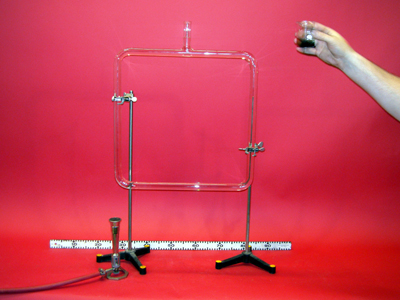
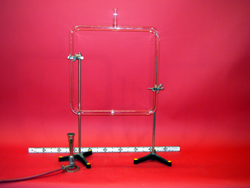
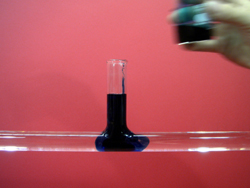
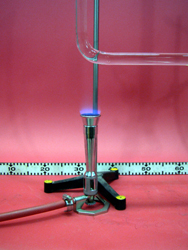
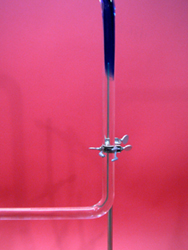
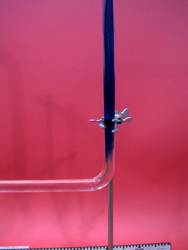
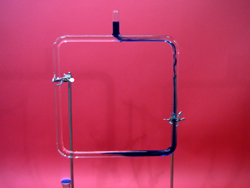
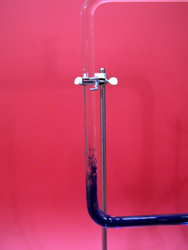
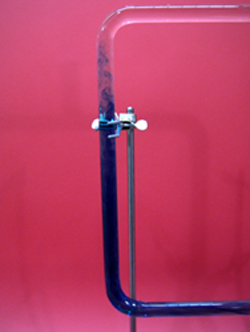
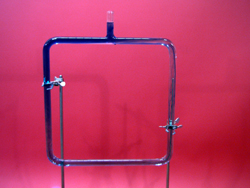
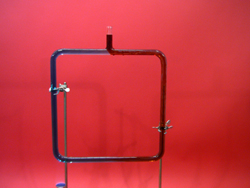
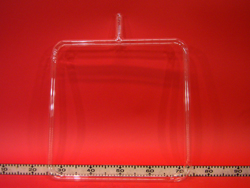
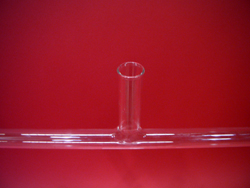
Mount the tube so that the opening is on the top (see photos) by gently clamping both vertical portions to the stands.
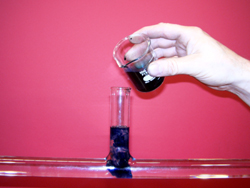
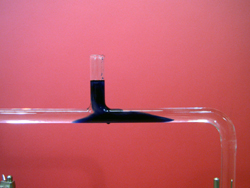
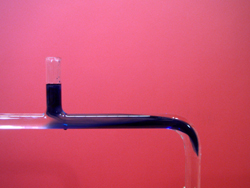
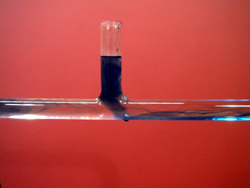
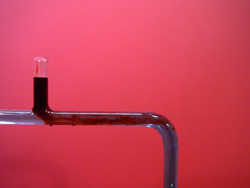
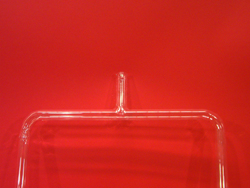
Fill the tube with water so that the water level is about a half inch above the main tube (see photo). Try to get any air bubbles out.
Connect the burner to the gas supply (red panel on the gas cart) using the attached red gas hose.
Ignite the burner by opening the gas valve and lighting a match over the burner.
Place the burner underneath one of the vertical portions of the tube and adjust the flame height accordingly by adjusting the gas valve.
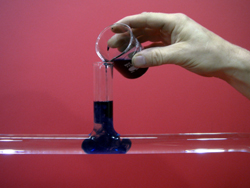
Add a few drops of food dye to the water through the top opening and watch them flow in the tube.
Cautions, Warnings, or Safety Concerns:
Careful not to burn yourself when working with the burner.
Discussion:
Discuss the physics behind the demonstration, explaining some of the various steps of the demonstration when appropriate.
Videos:
References:
List any references