|
Size: 3454
Comment:
|
← Revision 22 as of 2018-07-18 16:41:02 ⇥
Size: 4983
Comment:
|
| Deletions are marked like this. | Additions are marked like this. |
| Line 2: | Line 2: |
| ||<:30%>[:PiraScheme#Mechanics: Table of Mechanics Demonstration]||<:30%>[:MEEquipmentList: List of Mechanics Equipment & Supplies]||<:30%>[:Demonstrations:Lecture Demonstrations]|| | ||<30% style=""text-align:center" ">[[PiraScheme#Mechanics|Table of Mechanics Demonstration]] ||<30% style=""text-align:center" ">[[MEEquipmentList|List of Mechanics Equipment & Supplies]] ||<30% style=""text-align:center" ">[[Demonstrations|Lecture Demonstrations]] || |
| Line 5: | Line 6: |
| '''Topic and Concept:''' | |
| Line 6: | Line 8: |
| '''Topic and Concept:''' Newton's Second Law, [:Newtons2NDLaw#ForceMassAndAcceleration: 1G10. Force, Mass, and Acceleration] |
. Newton's Second Law, [[Newtons2NDLaw#ForceMassAndAcceleration|1G10. Force, Mass, and Acceleration]] '''pira200 Listed''' |
| Line 10: | Line 13: |
| * '''Cabinet:''' [:MechanicsCabinet:Mechanic (ME)] * '''Bay:''' [:MechanicsCabinetBayA1:(A1)] * '''Shelf:''' #1,2,3.. |
|
| Line 14: | Line 14: |
| attachment: mainPhoto | * '''Cabinet:''' [[MechanicsCabinet|Mechanic (ME)]] * '''Bay:''' [[MechanicsCabinetBayA5|(A5)]] * '''Shelf:''' #2/3 {{attachment:TableSetup01-400.jpg}} {{attachment:TableSetup07-400.jpg}} |
| Line 19: | Line 23: |
||<:style="width: 60%" :40%>'''Equipment'''||<:30%>'''Location'''||<:25%>'''ID Number'''|| |
||<40% style="" & quot; ;text-align:center" ">'''Equipment''' ||<30% style=""text-align:center" ">'''Location''' ||<25% style=""text-align:center" ">'''ID Number''' || |
| Line 22: | Line 25: |
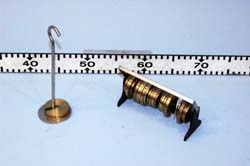
| ||PASCO Track||ME, Bay B1, Shelf #2|| || ||PASCO Cart||ME, Bay B1, Shelf #2|| || ||PASCO Smart Pulley w/Photogate||ME, Bay B1, Shelf #2|| || ||String||ME, Bay B1, Shelf #2|| || ||Weight||ME, Bay A1, Shelf #2|| || |
||PASCO 1m Track ||ME, Cubby C4 || || ||PASCO 2.25m Track ||Floor Item - ME, North Wall || || ||PASCO Cart ||ME, Bay A5, Shelf #3 || || ||PASCO Smart Pulley w/Photogate ||ME, Bay A5, Shelf #2 ||A1.EQ.102 || ||String ||ME, Bay B1, Shelf #2 || || ||Weight ||ME, Bay A1, Shelf #2 || || ||[[PASCOInterfaceComputer|PASCO Interface Computer]] ||Floor Item, South Wall ||A1.EQ.100 || |
| Line 29: | Line 34: |
| '''''Important Setup Notes:''''' * '''''If using the PASCO interface is desired for the graphical output, a 24-hour notice is required.''''' |
|
| Line 33: | Line 36: |
| '''Setup and Procedure:''' | '''''Important Setup Notes:''''' * '''''If using the PASCO interface is desired for the graphical output, a 24-hour notice is required.''''' '''Setup and Procedure:''' |
| Line 36: | Line 43: |
| 1. Using the height adjustment screws on the track, level the track. 1. Place the PASCO cart on the track, and add weight to it if desired. 1. Attach the PASCO smart pulley and photogate to the track. 1. Use the Velcro to keep the cart in place while the weight is attached and the string run over the pully. 1. When ready, give the cart a push in the desired direction of travel, and observe it accelerating at a uniform rate. |
1. Level the track by using the height adjustment screws on the track. 1. Place a small lead brick under the track by the one set of legs to keep the track from moving on the table when the cart accelerates. 1. Place the PASCO cart on the track, and add weight to it if desired. (The more weight, the more fiction between the cart and track) 1. Attach the PASCO smart pulley and photo-gate to the track. 1. Use the Velcro to keep the cart in place while the weight is attached and the string run over the pulley. 1. When ready, release the cart from the Velcro and observe it accelerating at a uniform rate. (Don't push the cart, this well give you the wrong data) |
| Line 42: | Line 50: |
| Optional Addition of the PASCO Interface with Computer: 1. Boot the computer, and attach then power on the PASCO interface. 1. Open Data Studio which is accessible from the desktop. 1. Open the experimental setup file which is located in // 1. Follow the above steps omitting the final step where the cart is released. 1. When ready to release the cart, click on "start run" in Data Studio to begin taking data. 1. Release car. 1. Just before the cart collides with the bumper, stop the run by clicking "end run" in Data Studio (see plot below for an example). |
Optional Addition of the PASCO Interface with Computer: |
| Line 51: | Line 52: |
| attachment:TestRun2-400.jpg | 1. Please refer to the [[PASCOInterfaceComputer|PASCO Interface Computer, A1.EQ.100]] page for general operations of the computer. 1. Before booting up the computer, make sure that the Photo-gate 1/4" plug is in Slot "A" of the PASCO Interface box. 1. Open the experimental setup file which is located on the desk top in the folder PASCO Interface under the file name ConsAcc.ds 1. Follow the above steps omitting the final step where the cart is released. 1. When ready record the data, click on "Start" at about the same time as when you release the cart. 1. If the auto stop feature is setup within Data Studio, the program will automatically stop recoding after the set time interval that was setup. If not, then just before the cart collides with the bumper click "Stop" in Data Studio (see plot below for an example or [[PASCOInterfaceComputer|PASCO Interface Computer, A1.EQ.100]] page). {{attachment:TestRun2-800.jpg}} |
| Line 54: | Line 62: |
| Line 56: | Line 65: |
| '''Discussion:''' | |
| Line 57: | Line 67: |
| '''Discussion:''' | The net force acting on the cart is a little less than the weight pulling it down the track due to friction. There is some friction in the axles of the car and in the pulley which acts to oppose the motion of the cart. The magnitude and direction of these forces remains constant throughout the demonstration. Therefore, by Newton's second law, since F = m*a = constant and since m is constant so must the acceleration remain constant. Because of this constant acceleration, we expect the position vs. time curve to be quadratic in time, and we also expect the velocity vs. time curve to be linear in time. || {{attachment:1.25MeterTrack-02-250.jpg}} || {{attachment:1.25MeterTrack-03-250.jpg}} || {{attachment:MagneticCarOnTrack-02-250.jpg}} || {{attachment:CarWeights-01-250.jpg}} || || {{attachment:Weights01-250.jpg}} || {{attachment:SmartPulley02-250.jpg}} || {{attachment:Computer02-250.jpg}} || {{attachment:TableSetup02-250.jpg}} || || {{attachment:TableSetup03-250.jpg}} || {{attachment:TableSetup04-250.jpg}} || {{attachment:TableSetup05-250.jpg}} || {{attachment:TableSetup06-250.jpg}} || |
| Line 59: | Line 72: |
| The net force acting on the cart is a little less than the weight pulling it down the track. There is also some friction in the axles of the car and in the pulley which acts to oppose the motion of the cart. The magnitude and direction of these forces remains constant throughout the demonstration. Therefore, by Newton's second law, since F = m*a = constant and since m is constant so must the acceleration remain constant. Because of this constant acceleration, we expect the position vs. time curve to be quadratic in time, and we also expect the velocity vs. time curve to be linear in time. | |
| Line 61: | Line 73: |
| ||attachment: photo||attachment: photo||attachment: photo||attachment: photo|| | |
| Line 64: | Line 76: |
| * [https://www.youtube.com/user/LectureDemostrations/videos?view=1 Lecture Demonstration's Youtube Channel] | * [[https://www.youtube.com/user/LectureDemostrations/videos?view=1|Lecture Demonstration's Youtube Channel]] |
| Line 68: | Line 81: |
| * List any references | * N/A |
| Line 70: | Line 83: |
[:Instructional:Home] |
[[Instructional|Home]] |
Constant Acceleration Car, 1G10.10
Topic and Concept:
Newton's Second Law, 1G10. Force, Mass, and Acceleration
pira200 Listed
Location:
Cabinet: Mechanic (ME)
Bay: (A5)
Shelf: #2/3
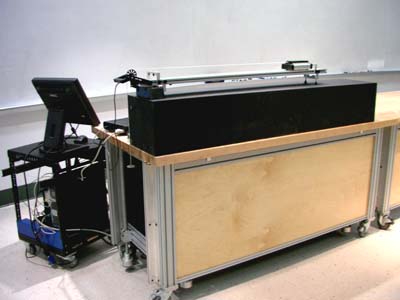
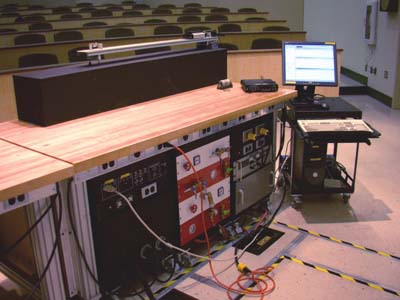
Abstract:
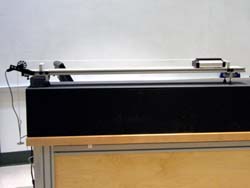
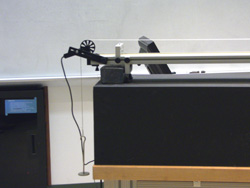
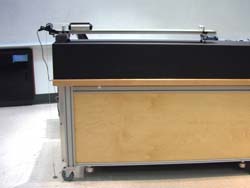
A PASCO cart attached to a mass with a string running over a smart pulley is accelerated at a constant rate. A computer together with the PASCO interface can be used to measure the position, speed, and acceleration as a function of time.(Similar to 1G10.25)
Equipment |
Location |
ID Number |
|
|
|
PASCO 1m Track |
ME, Cubby C4 |
|
PASCO 2.25m Track |
Floor Item - ME, North Wall |
|
PASCO Cart |
ME, Bay A5, Shelf #3 |
|
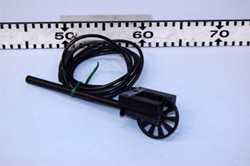
PASCO Smart Pulley w/Photogate |
ME, Bay A5, Shelf #2 |
A1.EQ.102 |
String |
ME, Bay B1, Shelf #2 |
|
Weight |
ME, Bay A1, Shelf #2 |
|
Floor Item, South Wall |
A1.EQ.100 |
Important Setup Notes:
If using the PASCO interface is desired for the graphical output, a 24-hour notice is required.
Setup and Procedure:
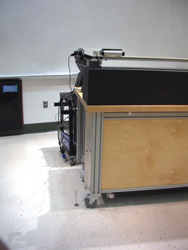
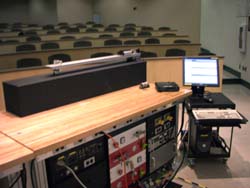
- Place the PASCO track on the lecture bench.
- Level the track by using the height adjustment screws on the track.
- Place a small lead brick under the track by the one set of legs to keep the track from moving on the table when the cart accelerates.
- Place the PASCO cart on the track, and add weight to it if desired. (The more weight, the more fiction between the cart and track)
- Attach the PASCO smart pulley and photo-gate to the track.
- Use the Velcro to keep the cart in place while the weight is attached and the string run over the pulley.
- When ready, release the cart from the Velcro and observe it accelerating at a uniform rate. (Don't push the cart, this well give you the wrong data)
Optional Addition of the PASCO Interface with Computer:
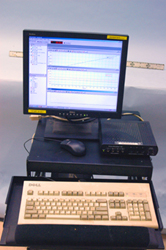
Please refer to the PASCO Interface Computer, A1.EQ.100 page for general operations of the computer.
- Before booting up the computer, make sure that the Photo-gate 1/4" plug is in Slot "A" of the PASCO Interface box.
Open the experimental setup file which is located on the desk top in the folder PASCO Interface under the file name ConsAcc.ds
- Follow the above steps omitting the final step where the cart is released.
- When ready record the data, click on "Start" at about the same time as when you release the cart.
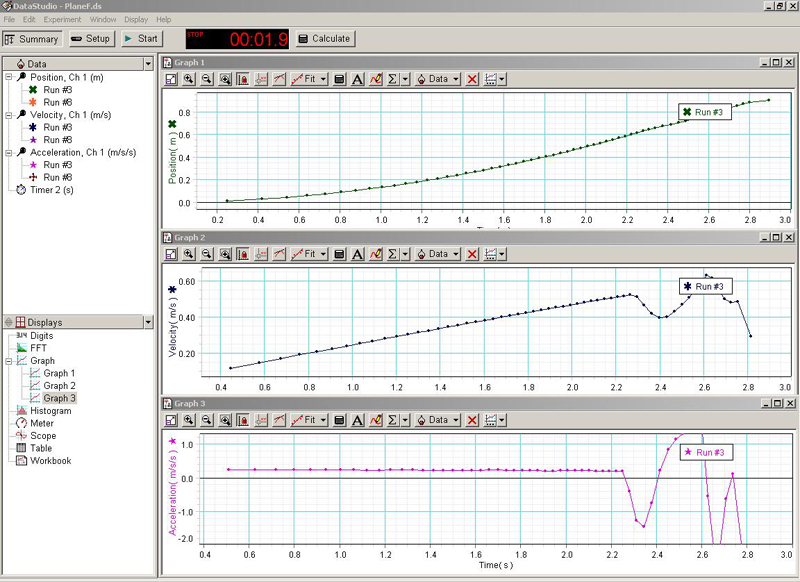
If the auto stop feature is setup within Data Studio, the program will automatically stop recoding after the set time interval that was setup. If not, then just before the cart collides with the bumper click "Stop" in Data Studio (see plot below for an example or PASCO Interface Computer, A1.EQ.100 page).
Cautions, Warnings, or Safety Concerns:
- N/A
Discussion:
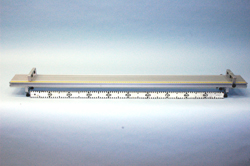
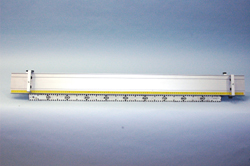
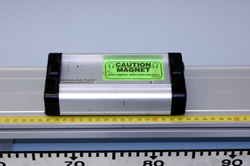
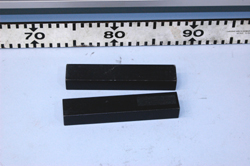
The net force acting on the cart is a little less than the weight pulling it down the track due to friction. There is some friction in the axles of the car and in the pulley which acts to oppose the motion of the cart. The magnitude and direction of these forces remains constant throughout the demonstration. Therefore, by Newton's second law, since F = m*a = constant and since m is constant so must the acceleration remain constant. Because of this constant acceleration, we expect the position vs. time curve to be quadratic in time, and we also expect the velocity vs. time curve to be linear in time.
|
|
|
|
|
|
|
|
|
|
|
|
Videos:
References:
- N/A
