|
Size: 3712
Comment:
|
← Revision 8 as of 2013-07-12 18:18:56 ⇥
Size: 3761
Comment: converted to 1.6 markup
|
| Deletions are marked like this. | Additions are marked like this. |
| Line 7: | Line 7: |
| attachment:Marx400-1.jpg | {{attachment:Marx400-1.jpg}} |
| Line 25: | Line 25: |
| ||attachment:MarxSetup-1a.jpg||attachment:MarxSetup-1.jpg||attachment:MarxSetup-2.jpg||attachment:MarxSetup-3.jpg|| | ||{{attachment:MarxSetup-1a.jpg}}||{{attachment:MarxSetup-1.jpg}}||{{attachment:MarxSetup-2.jpg}}||{{attachment:MarxSetup-3.jpg}}|| |
| Line 54: | Line 54: |
| ||attachment:Marx300-1.jpg||attachment:Marx300-2.jpg||attachment:Marx300-3.jpg||attachment:Marx300-4.jpg|| | ||{{attachment:Marx300-1.jpg}}||{{attachment:Marx300-2.jpg}}||{{attachment:Marx300-3.jpg}}||{{attachment:Marx300-4.jpg}}|| |
| Line 56: | Line 56: |
| ||attachment:MarxSetup-4.jpg||attachment:MarxSetup-5.jpg||attachment:MarxSetup-6.jpg||attachment:MarxSetup-7.jpg||attachment:MarxSetup-8.jpg|| | ||{{attachment:MarxSetup-4.jpg}}||{{attachment:MarxSetup-5.jpg}}||{{attachment:MarxSetup-6.jpg}}||{{attachment:MarxSetup-7.jpg}}||{{attachment:MarxSetup-8.jpg}}|| |
| Line 60: | Line 60: |
| 1. [http://en.wikipedia.org/wiki/Marx_generator Wikipedia] 1. [http://www.penguinslab.com/marx.htm Penguins Lab] 1. [http://www.electricstuff.co.uk/marxgen.htm Mike's Electric Stuff] |
1. [[http://en.wikipedia.org/wiki/Marx_generator|Wikipedia]] 1. [[http://www.penguinslab.com/marx.htm|Penguins Lab]] 1. [[http://www.electricstuff.co.uk/marxgen.htm|Mike's Electric Stuff]] |
| Line 66: | Line 66: |
| [:Demonstrations:Demonstrations] | [[Demonstrations]] |
| Line 68: | Line 68: |
| [:Instructional:Home] | [[Instructional|Home]] |
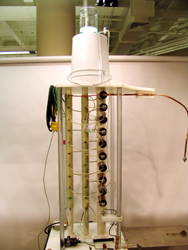
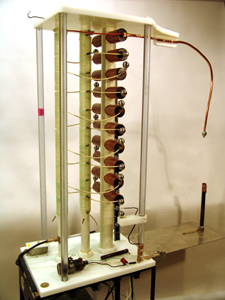
Marx Generator, 5C30.50
Location:
- Floor Item Room 2237
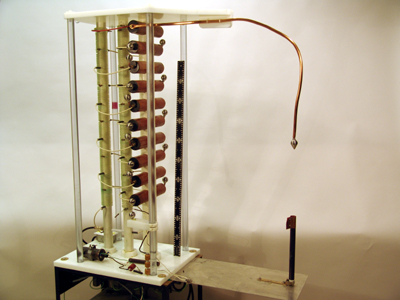
Description:
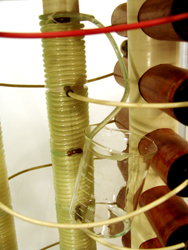
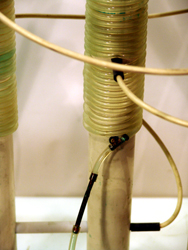
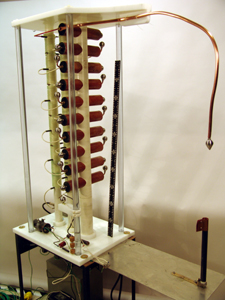
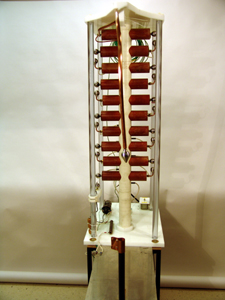
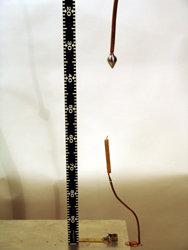
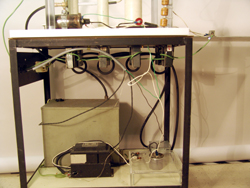
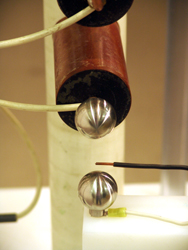
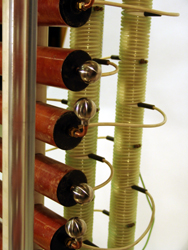
This Marx Generator consists of 10, .02MFD 50kV capacitors that are charged in parallel, then discharged in series to generate a very high voltage, enough to splitter a 6" long piece of half inch doweling. The resistor is made of a Cupric Sulfate (CuSO4) solution such that we maintain a resistivity of 1MΩ to 1.5MΩ between capacitors.
Equipment |
Location |
ID Number |
|
|
|
Marx Generator |
EM, Large Equipment Area |
5C30.50 |
Copper Sulfate solution |
??, Bay ??, Shelf #? |
|
Discharge wound |
ES, Bay A3, Shelf #2 |
|
Hearing Protection |
Stock Cabinet |
|
Optional Blast Shield |
TD, Bay A5, Shelf "T" |
|
|
|
|
|
|
|
Setup:
|
|
|
|
- Make the resistors are drained before unit is stored.
- Make sure there are no bubbles within the liquid resistors. This will break that circuit. Drain and refill resistors if there are bubbles.
- Firmly sectary green grounding wire to grounding black within the rooms.
- Make sure you have the Discharge Wound and safety gear.
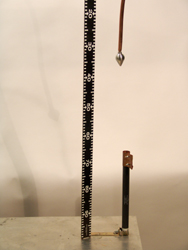
- Insert either that Discharge Resistor or the piece of doweling.
- The piece doweling should be allowed to soak for several hours in water to increase in conductivity.
- Place one nail in the doweling to use to hold the would under the discharge ball of the Marx. (If the wood isn't wet enough a nail on the other end will help the bolt fine it's way.
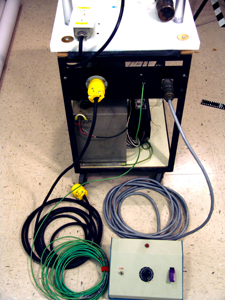
- Plug in the control box (the gray wire) to the Marx.
- Plug in the power cord into a 30A 110V twist-lock outlet.
- Turn on main power switch that is located on the Marx.
- The Marx Generator is now ready to be charged.
Cautions, Warnings, or Safety Concerns:
- Capacitors are tubing dielectric with a strength of 25kv max (#2031-068)
The Marx Generator WILL spontaneously discharge if it is charged too long.
- This Marx Generator can produce a bolt about 18" long and is very bright and loud. (The bolt/flash is about the size of woman's pinky finger.)
- Carefully remover the remaining charge on the capacitors by using the Discharge Wound. (Make sure the main switch to the Marx is off before)
Demonstration:
- The Marx Generator is now ready to be charged.
- From left to right; Flip the first switch on the control box.
- Rotate the Variable resistor to 90%-100% (The capacitors are now charging)
- Flip up the firing button guard as you count 10 or so seconds then push the detonation button.
- After discharge the capacitors will recharge, unless you either flip the control box power switch off or turn the variable resistor to 0%.
- There is Still some charge left on the capacitors after discharge. Carefully use the Discharge Wound of discharge the capacitors.
|
|
|
|
|
|
|
|
|
References:
[Insert a back link to main topic list]
