|
Size: 938
Comment:
|
← Revision 6 as of 2013-07-12 18:18:09 ⇥
Size: 1014
Comment: converted to 1.6 markup
|
| Deletions are marked like this. | Additions are marked like this. |
| Line 1: | Line 1: |
| #acl reardon:read,write,delete,revert,admin FacultyGroup:read,write All:read | |
| Line 3: | Line 4: |
| Bells located in [:ElectrostaticsCabinet:Electrostatics Cabinet], A2. | Bells located in [[ElectrostaticsCabinet|Electrostatics Cabinet]], A2. |
| Line 5: | Line 6: |
| Toepler-Holtz located in [:ElectrostaticsCabinet:Electrostatics Cabinet], A3. | Toepler-Holtz located in [[ElectrostaticsCabinet|Electrostatics Cabinet]], A3. |
| Line 17: | Line 18: |
| attachment:ElectrostaticBells5B1030.jpg attachment:ElectrostaticBellsCloseUp.jpg |
{{attachment:ElectrostaticBells5B1030.jpg}} {{attachment:ElectrostaticBellsCloseUp.jpg}} |
| Line 20: | Line 21: |
| [:ElectricFieldsAndPotential:Electric Fields and Potential] | [[ElectricFieldsAndPotential|Electric Fields and Potential]] |
| Line 22: | Line 23: |
| [:Demonstrations:Demonstrations] | [[Demonstrations]] |
| Line 24: | Line 25: |
| [:Instructional:Home] | [[Instructional|Home]] |
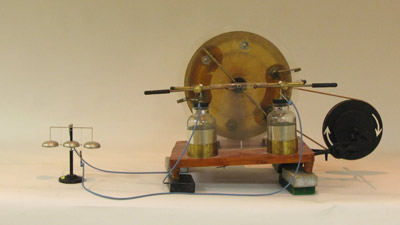
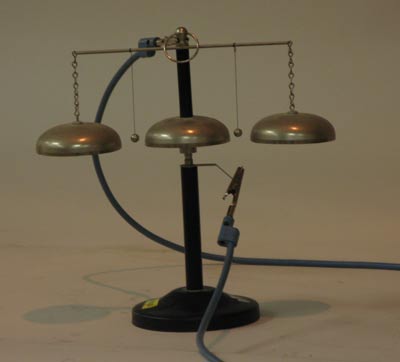
Electrostatic Bells 5B10.30
Bells located in Electrostatics Cabinet, A2.
Toepler-Holtz located in Electrostatics Cabinet, A3.
Discharge Toepler-Holtz generator: grasp insulating handles and put terminals (2cm diameter metal balls) in contact with each other.
Connect bells to Toepler-Holtz.
Separate terminals by 5 cm.
Crank Toepler-Holtz generator (there should be no spark between terminals). Bells should start to ring.
Discharge Toepler-Holtz generator--you will likely see a fat spark between the two terminals as you do this. Do not put your hands near the terminals before you discharge them--the spark from the Toepler-Holtz can be painful.

