|
Size: 2516
Comment:
|
Size: 3884
Comment: converted to 1.6 markup
|
| Deletions are marked like this. | Additions are marked like this. |
| Line 2: | Line 2: |
| ||<:30%>[:PiraScheme#Mechanics: Table of Mechanics Demonstration]||<:30%>[:MEEquipmentList: List of Mechanics Equipment & Supplies]||<:30%>[:Demonstrations:Lecture Demonstrations]|| | ||<:30%>[[PiraScheme#Mechanics| Table of Mechanics Demonstration]]||<:30%>[[MEEquipmentList| List of Mechanics Equipment & Supplies]]||<:30%>[[Demonstrations|Lecture Demonstrations]]|| |
| Line 7: | Line 7: |
| Rotational Dynamics, [:RotationalDynamics#Gyros: 1Q50. Gyroscopic Motion] | Rotational Dynamics, [[RotationalDynamics#Gyros| 1Q50. Gyroscopic Motion]] |
| Line 10: | Line 10: |
| * '''Cabinet:''' [:MechanicsCabinet:Mechanic (ME)] * '''Bay:''' [:MechanicsCabinetBayA12:(A12)] |
* '''Cabinet:''' [[MechanicsCabinet|Mechanic (ME)]] * '''Bay:''' [[MechanicsCabinetBayA12|(A12)]] |
| Line 14: | Line 14: |
| attachment:AdjPrecessGyro02-400.jpg | {{attachment:AdjPrecessGyro02-400.jpg}} |
| Line 22: | Line 22: |
| ||Gyroscope||[:MechanicsCabinetBayA12: ME, Bay A12, Shelf #1]|| || ||Electronic Driver||[:MechanicsCabinetBayA12: ME, Bay A12, Shelf #1]|| || |
||Gyroscope||[[MechanicsCabinetBayA12| ME, Bay A12, Shelf #1]]|| || ||Electronic Driver||[[MechanicsCabinetBayA12| ME, Bay A12, Shelf #1]]|| || |
| Line 33: | Line 33: |
| 1. List steps for setup then procedure. 1. ... |
1. Place gyroscope on tabletop. 1. Select placement of the counterweight. 1. Plug in the electric driver. 1. Turn the driver on, and put the rotating rubber wheel in contact with the brass wheel on the gyroscope while holding the gyroscope steady with your free hand. This will get the disc wheel spinning to high speed (larger angular momentum). 1. After releasing the gyroscope, it will begin to process. 1. If desired, repeat the demo trying different placements of the counterweight. Adjusting the position will affect both the rate and the direction of precession. |
| Line 42: | Line 46: |
| Discuss the physics behind the demonstration, explaining some of the various steps of the demonstration when appropriate. | Once spinning, the brass wheel has angular momentum. Since this quantity is conserved, the brass wheel "wants" to stay in its current spinning with its axis of rotation remaining stationary. However, there is also a torque applied to the spinning wheel due to the weight of the counterweight. Because of this torque, the system precesses. The higher the net torque, the shorter the period of precession. The direction of precession is determined by the direction of the net torque. By shifting the position of the counterweight, we shift the center of mass of the system. The direction will be determined by what side of the pivot point the center of mass is on. The system can also be made to nutate by adding a perturbation to its motion. See references below for more information. |
| Line 44: | Line 48: |
| ||attachment:AdjPrecessGyro01-250.jpg||attachment:AdjPrecessGyro17-250.jpg||attachment:AdjPrecessGyro03-250.jpg||attachment:AdjPrecessGyro04-250.jpg|| ||attachment:AdjPrecessGyro05-250.jpg||attachment:AdjPrecessGyro06-250.jpg||attachment:AdjPrecessGyro07-250.jpg||attachment:AdjPrecessGyro08-250.jpg|| ||attachment:AdjPrecessGyro09-250.jpg||attachment:AdjPrecessGyro10-250.jpg||attachment:AdjPrecessGyro11-250.jpg||attachment:AdjPrecessGyro12-250.jpg|| ||attachment:AdjPrecessGyro13-250.jpg||attachment:AdjPrecessGyro14-250.jpg||attachment:AdjPrecessGyro15-250.jpg||attachment:AdjPrecessGyro16-250.jpg|| |
||{{attachment:AdjPrecessGyro01-250.jpg}}||{{attachment:AdjPrecessGyro17-250.jpg}}||{{attachment:AdjPrecessGyro03-250.jpg}}||{{attachment:AdjPrecessGyro04-250.jpg}}|| ||{{attachment:AdjPrecessGyro05-250.jpg}}||{{attachment:AdjPrecessGyro06-250.jpg}}||{{attachment:AdjPrecessGyro07-250.jpg}}||{{attachment:AdjPrecessGyro08-250.jpg}}|| ||{{attachment:AdjPrecessGyro09-250.jpg}}||{{attachment:AdjPrecessGyro10-250.jpg}}||{{attachment:AdjPrecessGyro11-250.jpg}}||{{attachment:AdjPrecessGyro12-250.jpg}}|| ||{{attachment:AdjPrecessGyro13-250.jpg}}||{{attachment:AdjPrecessGyro14-250.jpg}}||{{attachment:AdjPrecessGyro15-250.jpg}}||{{attachment:AdjPrecessGyro16-250.jpg}}|| ||{{attachment:ElectricDriver01-250.jpg}}||{{attachment:PrecessionNutation-250.png}}|| |
| Line 50: | Line 55: |
| * [https://www.youtube.com/user/LectureDemostrations/videos?view=1 Lecture Demonstration's Youtube Channel] | * [[https://www.youtube.com/user/LectureDemostrations/videos?view=1|Lecture Demonstration's Youtube Channel]] |
| Line 54: | Line 59: |
| * [https://en.wikipedia.org/wiki/Gyroscope Wikipedia - Gyroscope] * [https://en.wikipedia.org/wiki/Angular_momentum Wikipedia - Angular Momentum] * [https://en.wikipedia.org/wiki/Nutation Wikipedia - Nutation] * [https://en.wikipedia.org/wiki/Precession Wikipedia - Precession] |
* [[https://en.wikipedia.org/wiki/Gyroscope|Wikipedia - Gyroscope]] * [[https://en.wikipedia.org/wiki/Angular_momentum|Wikipedia - Angular Momentum]] * [[https://en.wikipedia.org/wiki/Nutation|Wikipedia - Nutation]] * [[https://en.wikipedia.org/wiki/Precession|Wikipedia - Precession]] |
| Line 61: | Line 66: |
| [:Instructional:Home] | [[Instructional|Home]] |
Adjustable Precession Gyroscope, 1Q50.50
Topic and Concept:
Rotational Dynamics, 1Q50. Gyroscopic Motion
Location:
Cabinet: Mechanic (ME)
Bay: (A12)
Shelf: #1
Abstract:
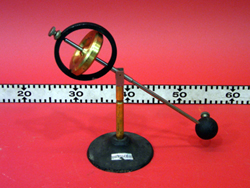
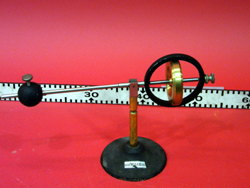
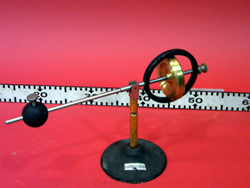
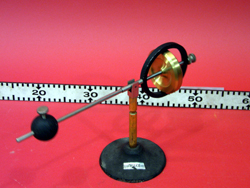
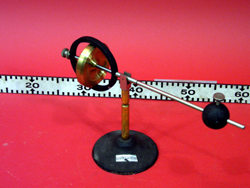
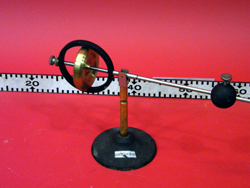
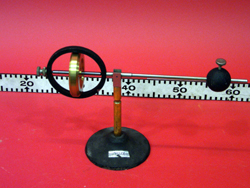
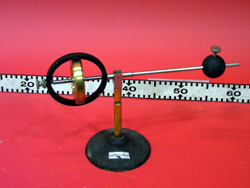
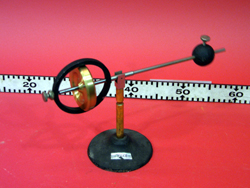
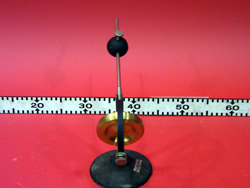
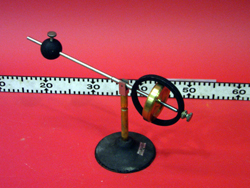
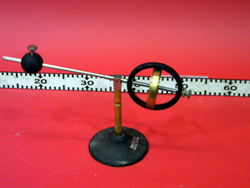
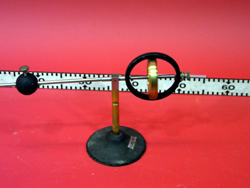
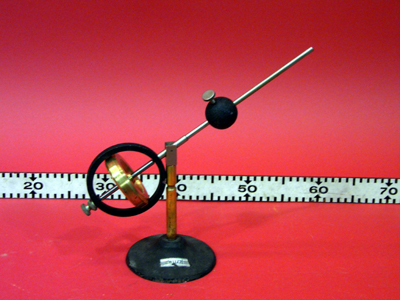
A gyroscope has a counterweight with adjustable radial distance causing the rate and direction of precession to change.
Equipment |
Location |
ID Number |
|
|
|
Gyroscope |
|
|
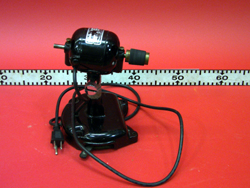
Electronic Driver |
|
Important Setup Notes:
- Demonstration may require practice.
Setup and Procedure:
- Place gyroscope on tabletop.
- Select placement of the counterweight.
- Plug in the electric driver.
- Turn the driver on, and put the rotating rubber wheel in contact with the brass wheel on the gyroscope while holding the gyroscope steady with your free hand. This will get the disc wheel spinning to high speed (larger angular momentum).
- After releasing the gyroscope, it will begin to process.
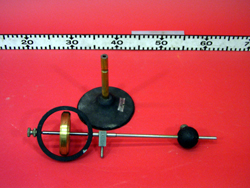
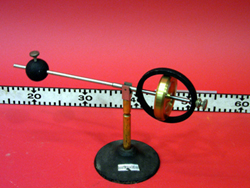
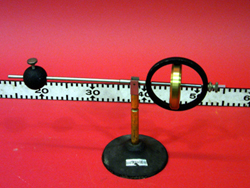
- If desired, repeat the demo trying different placements of the counterweight. Adjusting the position will affect both the rate and the direction of precession.
Cautions, Warnings, or Safety Concerns:
- Keep fingers, long hair, and hanging jewelry away from rubber wheel of electric driver!
Discussion:
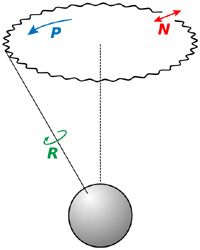
Once spinning, the brass wheel has angular momentum. Since this quantity is conserved, the brass wheel "wants" to stay in its current spinning with its axis of rotation remaining stationary. However, there is also a torque applied to the spinning wheel due to the weight of the counterweight. Because of this torque, the system precesses. The higher the net torque, the shorter the period of precession. The direction of precession is determined by the direction of the net torque. By shifting the position of the counterweight, we shift the center of mass of the system. The direction will be determined by what side of the pivot point the center of mass is on. The system can also be made to nutate by adding a perturbation to its motion. See references below for more information.
|
|
|
|
|
|
|
|
|
|
|
|
|
|
|
|
|
|
Videos:
References:
